Today is a good day and another Photo Focus episode! If you’re new to the podcast, you’ll notice that all of the info I share can be helpful when building a business, photography biz or otherwise. I’ll title things as a PHOTO FOCUS when I dive deep into something that’s super specific to photographers.
Today I want to walk you through a quick and easy way to begin shooting in-camera double exposures. If you’re not sure what I’m talking about, head to jennings.photo and check out a few samples there.

Sometimes we get stuck in a little bit of a photo rut and need to switch things up a bit. Even if you’re just learning this for fun and don’t intend to incorporate it into your business, switching things up always helps to get the creative juices flowing!
Finally, before we get started, if you’re more of a visual learner, I have a full guide with images explaining some of the steps for you too keep at jennings.photo/double. It’s a complete outline of this episode so you don’t have to keep rewinding and pausing, too. You can find a copy at jennings.photo/double
Okay, let’s dive in!
What you will need:
This tutorial is for the Canon 5D mk iv DSLR. If you have an older model, such as the 5D mk iii, you’re good to go, too.
If you have a different camera, and you know how to initiate the multiple exposure mode, this tutorial will help you achieve a balanced shot as well.
Note: If you’re new to photography, I recommend setting the camera to “P” mode. I shoot manual, and did for all of these images, but if that freaks you out, “P” is the way to go.
Good Weather
Also seems obvious, but it’s definitely something to think about if you’re going to shoot outside. For me, an overcast day is ideal for outdoor “base” shots.
First
On the Canon, there’s a button on the upper left side of the screen that looks like a pen pointing into a box. Push this and set your camera to multiple exposure (the middle option that looks like two boxes layered on each other).

Next
We’re going to set things up so you can check each image after you shoot it, rather than shooting in continuous multiple exposure mode. I find this to be easier, but feel free once you get better to set things to continuous.
The top line of the red multiple exposure menu should read “disable” by default. Click this to turn it to func/ctrl.
You can add up to 9 exposures, but for the purpose of this guide I’m working with only 2, and that is what’s pictured in this guide, too.
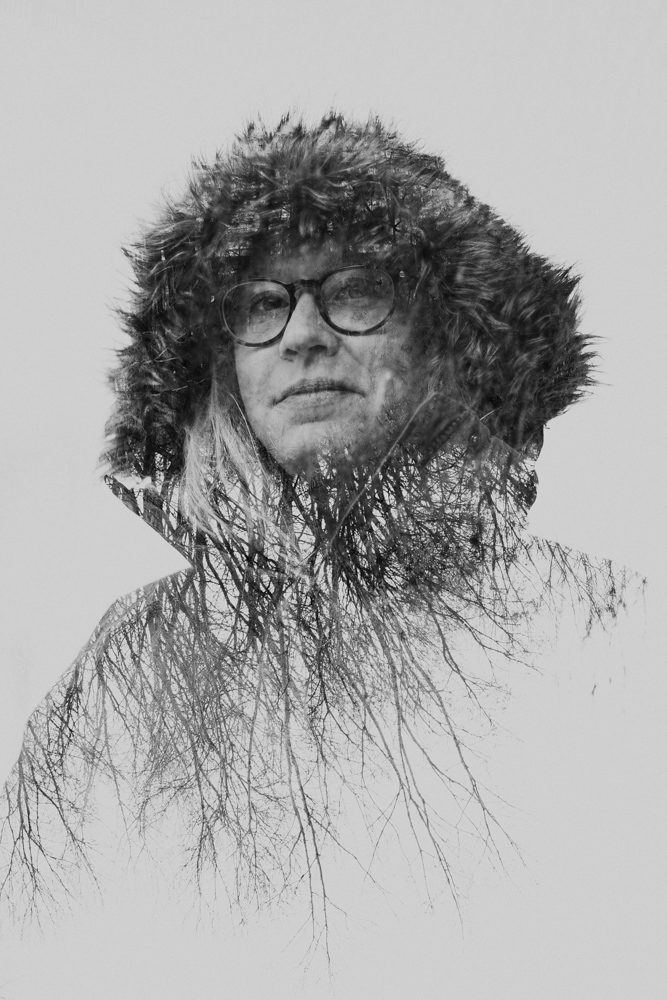
Note: The brightness/darkness of your original or base image and the images added next are compared at the same position, and then the bright part (dark part) will be left in the picture. This is how negative space is achieved in the photos I’ve included above. I’ll explain this in more detail as we continue.
You’re Ready To Shoot!
For the portraits you see above, here is my process after following the steps above.
Your first (base) image should be shot against as much negative space as you can manage. All of the portraits in this guide were shot with a cloudy sky as the background. I usually crouched down or had the subject stand on something like a chair to achieve this.
Your second image (in my case, plants or trees) will be layered using the camera screen, typically turning the camera for best results. The portrait (first image) will show up in the darkest part of the next layer (second image), in my case, the trees. Choose a second layer with opposite negative space.

Huh?
For example: I took a portrait with my subject against a white background, in this case, a cloudy sky.
For the next portion, I found a row of pine trees that were also against a white background, again with a cloudy sky. I rotated the camera upside down so the trees covered the portrait’s face and the tops of the trees poked out of the bottom of the torso. This allows for negative/white space below the portrait in the final image.
For the other image in this collection you’ll notice instead of the bottom, I turned the camera so the trees came out of the back of the head.
This definitely takes a little practice, but you’ll get it!
I’d LOVE to see your images!
Request to join my Double Exposure board on Pinterest here and share!
Hopefully this inspires you to get outside and be creative with your work!
Thank you for listening.
In all you want to achieve, consistency is key.
Love and light

